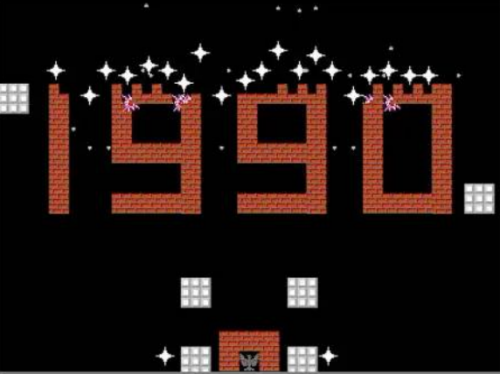
長(zhǎng)沙前端培訓(xùn):一招教你用vue3+canvas實(shí)現(xiàn)坦克大戰(zhàn)
記得幾年前剛做前端開發(fā)的時(shí)候,跟著師傅用純 es5 實(shí)現(xiàn)了這款坦克大戰(zhàn),可以說(shuō)我入行前端是從 javaScript 小游戲開始的,時(shí)間已匆匆過(guò)去了數(shù)年,前端發(fā)展日新月異,各種新框架、新概念層出不窮,很容易就迷失在對(duì)各種新技術(shù)的盲目學(xué)習(xí)和應(yīng)用中,真正的編程是什么呢?值得思考的問題。我準(zhǔn)備用 vue3 重新實(shí)現(xiàn)一下這款游戲,順便回顧和梳理下自己的知識(shí)體系。

W/上 S/下 A/左 D/右 F/射擊
讓我們開始吧!
架構(gòu)搭建
項(xiàng)目技術(shù)選型為 vue3、vite、less、pnpm、ts,按照vue3 官網(wǎng)文檔來(lái)新建項(xiàng)目,注意:雖然我用了 vue3 實(shí)際上只是強(qiáng)行嘗鮮,主體內(nèi)容都是 js 用到的框架特性有限。
$ pnpm create vite <project-name> -- --template vue
$ cd <project-name>
$ pnpm install
$ pnpm add -D less
$ pnpm dev
Canvas 構(gòu)造函數(shù)
游戲的核心為 canvas 畫布和坦克元素,我們定義兩個(gè)構(gòu)造函數(shù)
canvas 構(gòu)造函數(shù)的定義參數(shù)、方法:dom、dimension 尺寸、renderTo 渲染函數(shù)、drawText 文本繪制函數(shù)、drawImageSlice 圖片繪制函數(shù)
畫布繪制
canvas 圖層按照一般的游戲設(shè)計(jì)優(yōu)化理念,需要為靜態(tài)背景和動(dòng)態(tài)元素單獨(dú)用不同的 canvas 圖層表示,每次更新時(shí)只需要重新繪制動(dòng)態(tài)元素就好了,我抽象出一個(gè)渲染函數(shù)
// 渲染
this.renderTo = function renderTo(container_id) {
if (!is_rendered) {
let container = document.getElementById(container_id)
//畫布起始坐標(biāo)
dom = document.createElement('canvas') // 創(chuàng)造canvas畫布
dom.setAttribute('class', 'canvas')
ctx = dom.getContext('2d')
dom.setAttribute('width', container.clientWidth)
dom.setAttribute('height', container.clientHeight)
// 畫布尺寸
dimension = {
x: container.clientWidth,
y: container.clientHeight,
}
container.insertBefore(dom, container.firstChild) // 插入cantainer容器
}
}
文本渲染
想要知道畫布中的具體位置坐標(biāo),可以定義一個(gè)函數(shù),當(dāng)鼠標(biāo)滑動(dòng)時(shí)候執(zhí)行來(lái)將當(dāng)前位置坐標(biāo)繪制出來(lái)
this.drawText = function drawText(text, offset_left, offset_top, font) {
ctx.font = font || '25px Calibri'
ctx.fillStyle = '#fff'
ctx.fillText(text, offset_left, offset_top)
}
圖片
畫布重繪前的 clear
每次重繪前需要先擦掉整個(gè)畫布
this.clear = function clear() {
ctx.clearRect(0, 0, dimension.x, dimension.y)
}
核心:繪制函數(shù)
坦克、子彈、建筑等元素等繪制都是通過(guò)這個(gè)函數(shù)來(lái)完成的,實(shí)現(xiàn)遠(yuǎn)離是利用來(lái)雪碧圖,通過(guò)坐標(biāo)抓取特定位置的圖片元素來(lái)獲取各種不同坦克等元素的UI;
通過(guò) rotate 旋轉(zhuǎn)元素來(lái)實(shí)現(xiàn)坦克的轉(zhuǎn)向;
this.drawImageSlice = function drawImage(img_ele, sx, sy, sWidth, sHeight, x, y, rotatation) {
ctx.save()
ctx.translate((2 * x + sWidth) / 2, (2 * y + sHeight) / 2) // 改變起始點(diǎn)坐標(biāo)
ctx.rotate((Math.PI / 180) * rotatation) // 旋轉(zhuǎn)
x = x || 0
y = y || 0
ctx.drawImage(img_ele, sx, sy, sWidth, sHeight, -sWidth / 2, -sHeight / 2, sWidth, sHeight)
ctx.restore() // 復(fù)原
}
圖片
BattleCity 構(gòu)造函數(shù)
BattleCity 構(gòu)造函數(shù)定義坦克的各種配置信息,和方法函數(shù)
let TankConfig = function (cfg) {
this.explosion_count = cfg.explosion_count
this.width = cfg.type.dimension[0]
this.height = cfg.type.dimension[1]
this.missle_type = cfg.missle_type || MISSILE_TYPE.NORMAL
this.x = cfg.x || 0
this.y = cfg.y || 0
this.direction = cfg.direction || DIRECTION.UP
this.is_player = cfg.is_player || 0
this.moving = cfg.moving || 0
this.alive = cfg.alive || 1
this.border_x = cfg.border_x || 0
this.border_y = cfg.border_y || 0
this.speed = cfg.speed || TANK_SPEED
this.direction = cfg.direction || DIRECTION.UP
this.type = cfg.type || TANK_TYPE.PLAYER0
}
實(shí)現(xiàn)坦克的移動(dòng)
用鍵盤的 W、S、A、D、來(lái)表示上下左右方向鍵,按下鍵盤則會(huì)觸發(fā)對(duì)應(yīng)坦克實(shí)例的 move 函數(shù),用于計(jì)算移動(dòng)后的位置坐標(biāo)信息,注意:對(duì)邊界條件的判斷,不可使其超出戰(zhàn)場(chǎng)邊界。
CanvasSprite.prototype.move = function (d, obstacle_sprites) {
this.direction = d
switch (d) {
case DIRECTION.UP:
if ((obstacle_sprites && !this.checkRangeOverlap(obstacle_sprites)) || !obstacle_sprites) {
this.y -= this.speed
if (this.y <= 5) {
if (!this.out_of_border_die) {
this.y = 0
} else {
// this.alive = 0;
this.explode()
document.getElementById('steelhit').play()
}
}
}
break
case DIRECTION.DOWN:
if ((obstacle_sprites && !this.checkRangeOverlap(obstacle_sprites)) || !obstacle_sprites) {
this.y += this.speed
if (this.y + this.height >= this.border_y - 10) {
if (!this.out_of_border_die) {
this.y = this.border_y - this.height
} else {
// this.alive = 0;
this.explode()
document.getElementById('steelhit').play()
}
}
}
break
case DIRECTION.LEFT:
if ((obstacle_sprites && !this.checkRangeOverlap(obstacle_sprites)) || !obstacle_sprites) {
this.x -= this.speed
if (this.x <= 5) {
if (!this.out_of_border_die) {
this.x = 0
} else {
// this.alive = 0;
this.explode()
document.getElementById('steelhit').play()
}
}
}
break
case DIRECTION.RIGHT:
if ((obstacle_sprites && !this.checkRangeOverlap(obstacle_sprites)) || !obstacle_sprites) {
this.x += this.speed
if (this.x + this.width >= this.border_x - 10) {
if (!this.out_of_border_die) {
this.x = this.border_x - this.width
} else {
// this.alive = 0;
this.explode()
document.getElementById('steelhit').play()
}
}
}
break
}
}
坦克發(fā)射子彈的邏輯
首先需要定義子彈的配置信息以及構(gòu)造函數(shù);
let MissileConfig = function (cfg) {
this.x = cfg.x
this.y = cfg.y
this.type = cfg.type || MISSILE_TYPE.NORMAL
this.width = cfg.width || this.type.dimension[0]
this.height = cfg.height || this.type.dimension[1]
this.direction = cfg.direction || DIRECTION.UP
this.is_from_player = cfg.is_from_player
this.out_of_border_die = cfg.out_of_border_die || 1 // 判斷邊界類型
this.border_x = cfg.border_x || 0
this.border_y = cfg.border_y || 0
this.speed = cfg.speed || TANK_SPEED
this.alive = cfg.alive || 1
}
var Missile = function (MissileConfig) {
var x = MissileConfig.x
var y = MissileConfig.y
var width = MissileConfig.width
var height = MissileConfig.width
var direction = MissileConfig.direction
this.type = MissileConfig.type
this.is_from_player = MissileConfig.is_from_player || 0
var explosion_count = 0
CanvasSprite.apply(this, [
{
alive: 1,
out_of_border_die: 1,
border_y: HEIGHT,
border_x: WIDTH,
speed: MISSILE_SPEED,
direction: direction,
x: x,
y: y,
width: width,
height: height,
},
])
this.isDestroied = function () {
return explosion_count > 0
}
this.explode = function () {
if (explosion_count++ === 5) {
this.alive = 0
}
}
this.getImg = function () {
if (explosion_count > 0) {
return {
width: TANK_EXPLOSION_FRAME[explosion_count].dimension[0],
height: TANK_EXPLOSION_FRAME[explosion_count].dimension[1],
offset_x: TANK_EXPLOSION_FRAME[explosion_count].image_coordinates[0],
offset_y: TANK_EXPLOSION_FRAME[explosion_count].image_coordinates[1],
}
} else {
return {
width: width,
height: height,
offset_x: this.type.image_coordinates[0],
offset_y: this.type.image_coordinates[1],
}
}
}
this.getHeadCoordinates = function () {
var h_x, h_y
switch (this.direction) {
case DIRECTION.UP:
h_x = this.x + this.width / 2 - this.type.dimension[0] / 2
h_y = this.y - this.type.dimension[1] / 2
break
case DIRECTION.DOWN:
h_x = this.x + this.width / 2 - this.type.dimension[0] / 2
h_y = this.y + this.height - this.type.dimension[1] / 2
break
case DIRECTION.LEFT:
h_x = this.x
h_y = this.y + this.width / 2 - this.type.dimension[0] / 2
break
case DIRECTION.RIGHT:
h_x = this.x + this.height
h_y = this.y + this.width / 2 - this.type.dimension[0] / 2
}
console.log({
x: h_x,
y: h_y,
})
return {
x: h_x,
y: h_y,
}
}
this._generateId = function () {
return uuidv4()
}
sprites[this._generateId()] = this
}
然后再定義一個(gè) fire 開發(fā)函數(shù),當(dāng)開火后,會(huì)使用 window.requestAnimationFrame() 來(lái)達(dá)到循環(huán)的效果,每次重繪最新的位置信息。
this.fire = function (boolean_type) {
if (!this.missle || !this.missle.alive) {
var coor = this.getCannonCoordinates()
this.missle = new Missile(
new MissileConfig({
x: coor.x,
y: coor.y,
direction: this.direction,
type: this.miss_type,
is_from_player: boolean_type,
})
)
if (boolean_type) {
document.getElementById('shoot').play()
}
}
}
總結(jié)
利用 requestAnimationFrame 來(lái)實(shí)現(xiàn)循環(huán)刷新畫布,通過(guò)修改各元素位置坐標(biāo)值,在下一次畫布重繪時(shí)更新視圖,這是階段交互的基本邏輯

猜你喜歡LIKE
最新文章NEW
相關(guān)推薦HOT
更多>>熱門推薦
零基礎(chǔ)必看的前端HTML+CSS教程
沸Java培訓(xùn)新手實(shí)戰(zhàn)必備!單機(jī)版坦克大戰(zhàn)分步實(shí)現(xiàn)項(xiàng)目源碼
熱3種Javascript圖片預(yù)加載的方法詳解
熱長(zhǎng)沙前端培訓(xùn):一招教你用vue3+canvas實(shí)現(xiàn)坦克大戰(zhàn)
新互聯(lián)網(wǎng)涼了?參加長(zhǎng)沙Java培訓(xùn)能找到工作嗎?
長(zhǎng)沙Java培訓(xùn)實(shí)戰(zhàn)項(xiàng)目,出游咨詢訂票系統(tǒng)開發(fā)流程
不參加長(zhǎng)沙Java培訓(xùn)能學(xué)會(huì)Java嗎?2022Java技能學(xué)習(xí)路線圖
千鋒長(zhǎng)沙Java培訓(xùn)分享之怎么學(xué)習(xí)Java集合?
千鋒長(zhǎng)沙前端培訓(xùn)分享之JavaScript面向?qū)ο缶幊趟枷朐斀?/p>
千鋒長(zhǎng)沙前端培訓(xùn)分享之web前端的回流和重繪
千鋒長(zhǎng)沙前端培訓(xùn)分享之3種Javascript圖片預(yù)加載的方法詳解
千鋒長(zhǎng)沙前端培訓(xùn)分享之利用Jest測(cè)試React組件
千鋒長(zhǎng)沙前端培訓(xùn)分享之JavaScript中Slice的用例
千鋒長(zhǎng)沙java培訓(xùn)分享之Socket編程
技術(shù)干貨


快速通道 更多>>
-
課程介紹
點(diǎn)擊獲取大綱 -
就業(yè)前景
查看就業(yè)薪資 -
學(xué)習(xí)費(fèi)用
了解課程價(jià)格 -
優(yōu)惠活動(dòng)
領(lǐng)取優(yōu)惠券 -
學(xué)習(xí)資源
領(lǐng)3000G教程 -
師資團(tuán)隊(duì)
了解師資團(tuán)隊(duì) -
實(shí)戰(zhàn)項(xiàng)目
獲取項(xiàng)目源碼 -
開班地區(qū)
查看來(lái)校路線


 京公網(wǎng)安備 11010802030320號(hào)